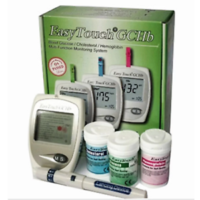
USER MANUAL
User Manual
How to setup and use Easy Touch GCU Blood Glucose?
Setting up and using the Easy Touch GCU Blood Glucose Monitoring System is straightforward. Below is a step-by-step guide to help you through the process:
Setting Up the Easy Touch GCU Blood Glucose Monitoring System
Supplies Needed
– Easy Touch GCU Blood Glucose Meter
– Easy Touch test strips
– Lancing device and lancets
– Alcohol swabs
– Control solution (optional, for testing accuracy)
– User manual
Steps for Setup
- Prepare the Meter:
– Remove the Easy Touch GCU Blood Glucose Meter from the packaging.
– Insert the batteries if not pre-installed (follow the instructions in the user manual).
- Set the Date and Time:
– Turn on the meter by pressing the power button.
– Navigate to the settings menu (refer to the user manual for specific button instructions).
– Set the date and time using the buttons, and confirm your settings.
- Insert Test Strips:
– Open the test strip vial and remove a test strip.
– Insert the test strip into the meter with the contact bars facing up and the arrow pointing in. The meter should turn on automatically.
- Prepare the Lancing Device:
– Load the lancet into the lancing device according to the instructions.
– Adjust the depth setting if necessary, depending on your skin type and comfort.
- Clean the Finger:
– Use an alcohol swab to clean the fingertip where you will draw blood. Allow it to dry completely.
Using the Easy Touch GCU Blood Glucose Meter
Steps for Testing Blood Glucose
- Obtain a Blood Sample:
– Use the lancing device to prick the side of your fingertip.
– Gently squeeze the finger to obtain a drop of blood.
- Apply Blood to the Test Strip:
– Touch the drop of blood to the edge of the test strip. The meter will automatically draw the blood into the strip.
– Wait for the meter to display the result.
- Read the Result:
– The meter will beep and display your blood glucose level on the screen.
– Record the result if necessary, along with the date and time of the test.
- Dispose of Used Materials:
– Safely dispose of the used test strip and lancet in a biohazard container.
- Turn Off the Meter:
– The meter will automatically turn off after a few minutes of inactivity. You can also turn it off manually by pressing the power button.
Additional Tips
– Control Solution Testing: Use the control solution periodically to ensure your meter and test strips are working correctly. Follow the instructions in the user manual for this process.
– Calibration: The Easy Touch GCU meter does not require calibration with blood samples, but you should follow any specific guidelines provided in the user manual.
– Regular Maintenance: Keep the meter clean and store it in a safe place. Replace the batteries as needed.
Troubleshooting
– If the meter does not turn on, check the battery installation.
– If you encounter error messages, refer to the user manual for troubleshooting steps.
By following these steps, you can effectively set up and use the Easy Touch GCU Blood Glucose Monitoring System for blood glucose testing. If you have any questions or concerns, consult the user manual or contact a healthcare


